How to Teach Students the Power of Editing in Writing
When we teach writing with our students, we always guide them through three big steps: Brainstorm, Draft, and Edit. While all three matter, the editing process is where students’ writing truly starts to shine, and where most of the heavy lifting happens.
Unfortunately, many students see editing as a quick 1–2 minute skim before declaring, “It looks good!” The reality is that strong editing requires a step-by-step approach that helps students slow down, notice their errors, and learn how to correct them.
So let’s walk through our step-by-step approach.
Steps 1 & 2: Brainstorm and Draft (The Foundation)

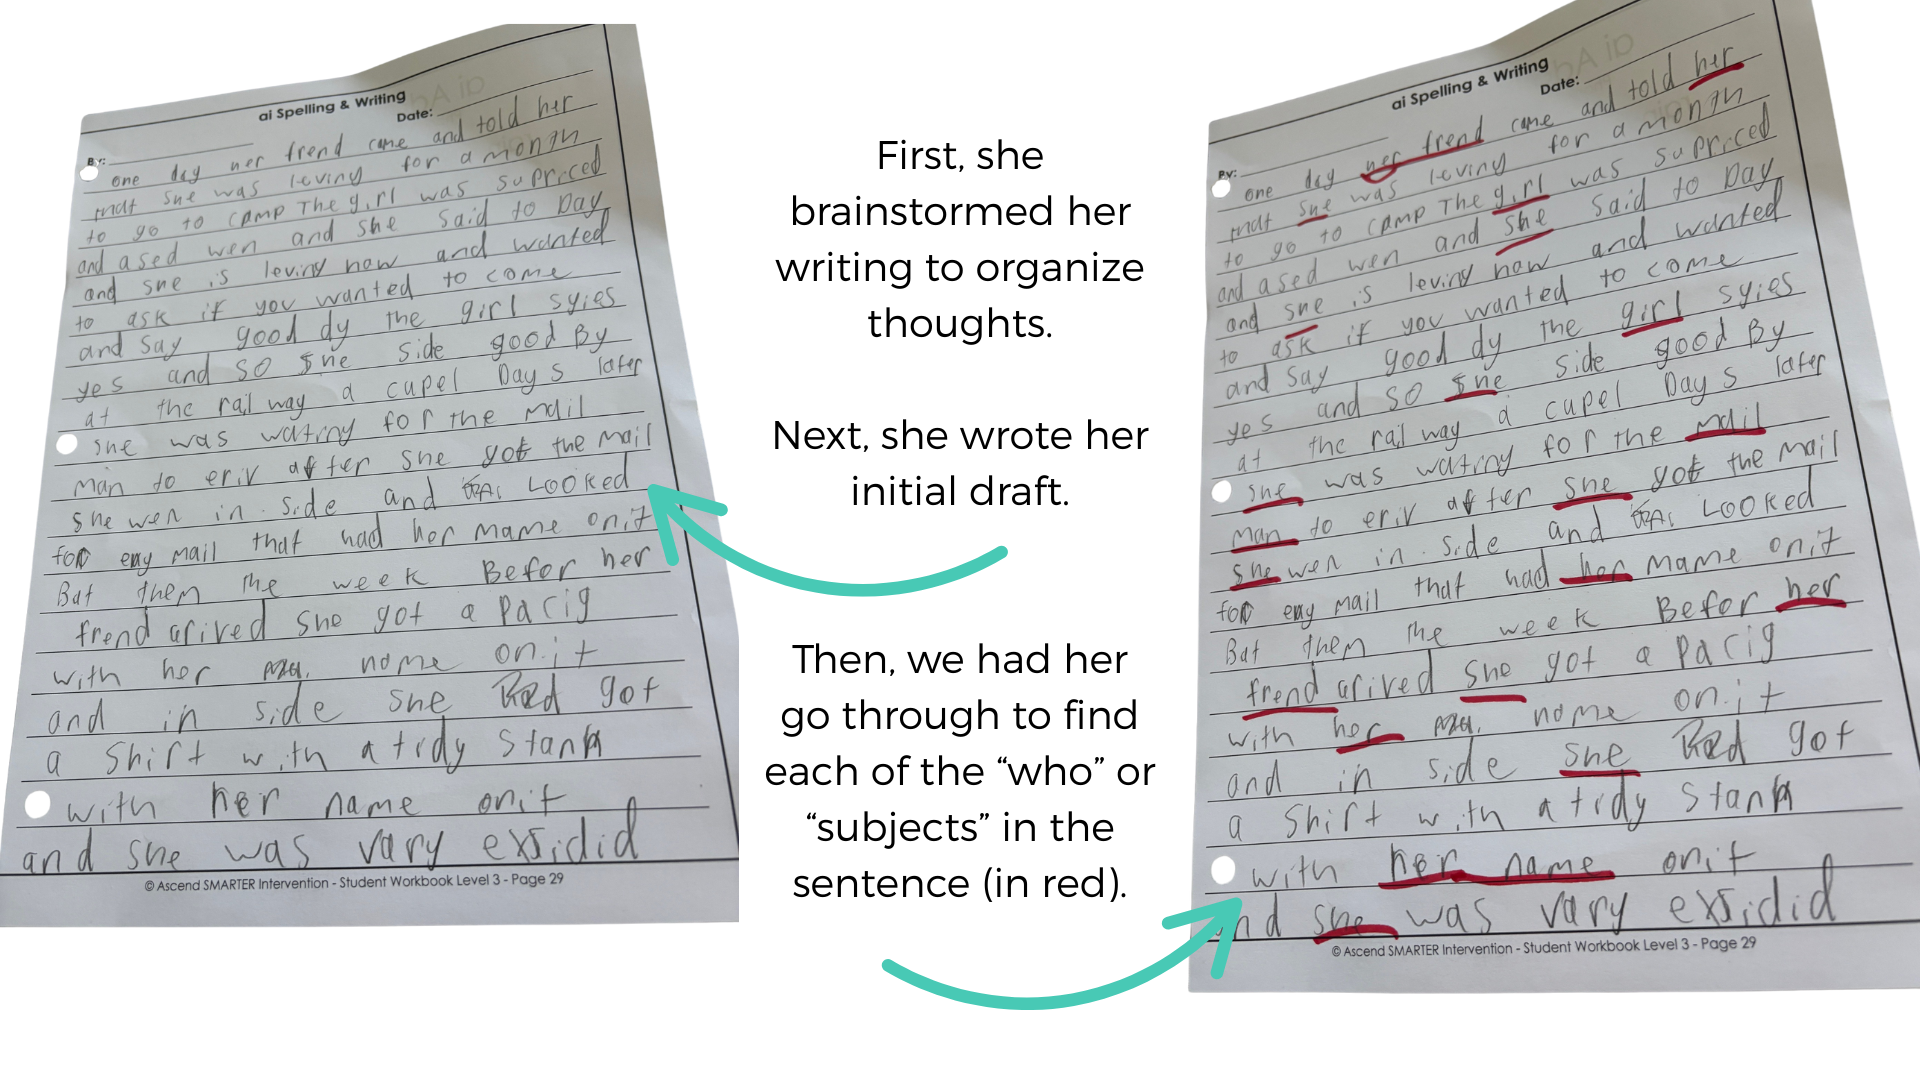
Before editing even begins, students need content to work with. We always start by having students brainstorm their ideas using a graphic organizer. This allows them to clarify their thoughts and see the flow of their writing before putting pen (or more likely pencil) to paper.
From there, they draft their sentences or paragraphs. This is just about translating the organized brainstorm into written form. Spelling and punctuation aren’t the priority yet. The draft sets the stage for the real work: editing.
Step 3: Editing with a Purpose
When we move into editing, we explicitly teach students that it’s not just about “fixing mistakes,” it’s about making their writing stronger and easier to read. To make this concrete, we break down editing into clear, color-coded steps:
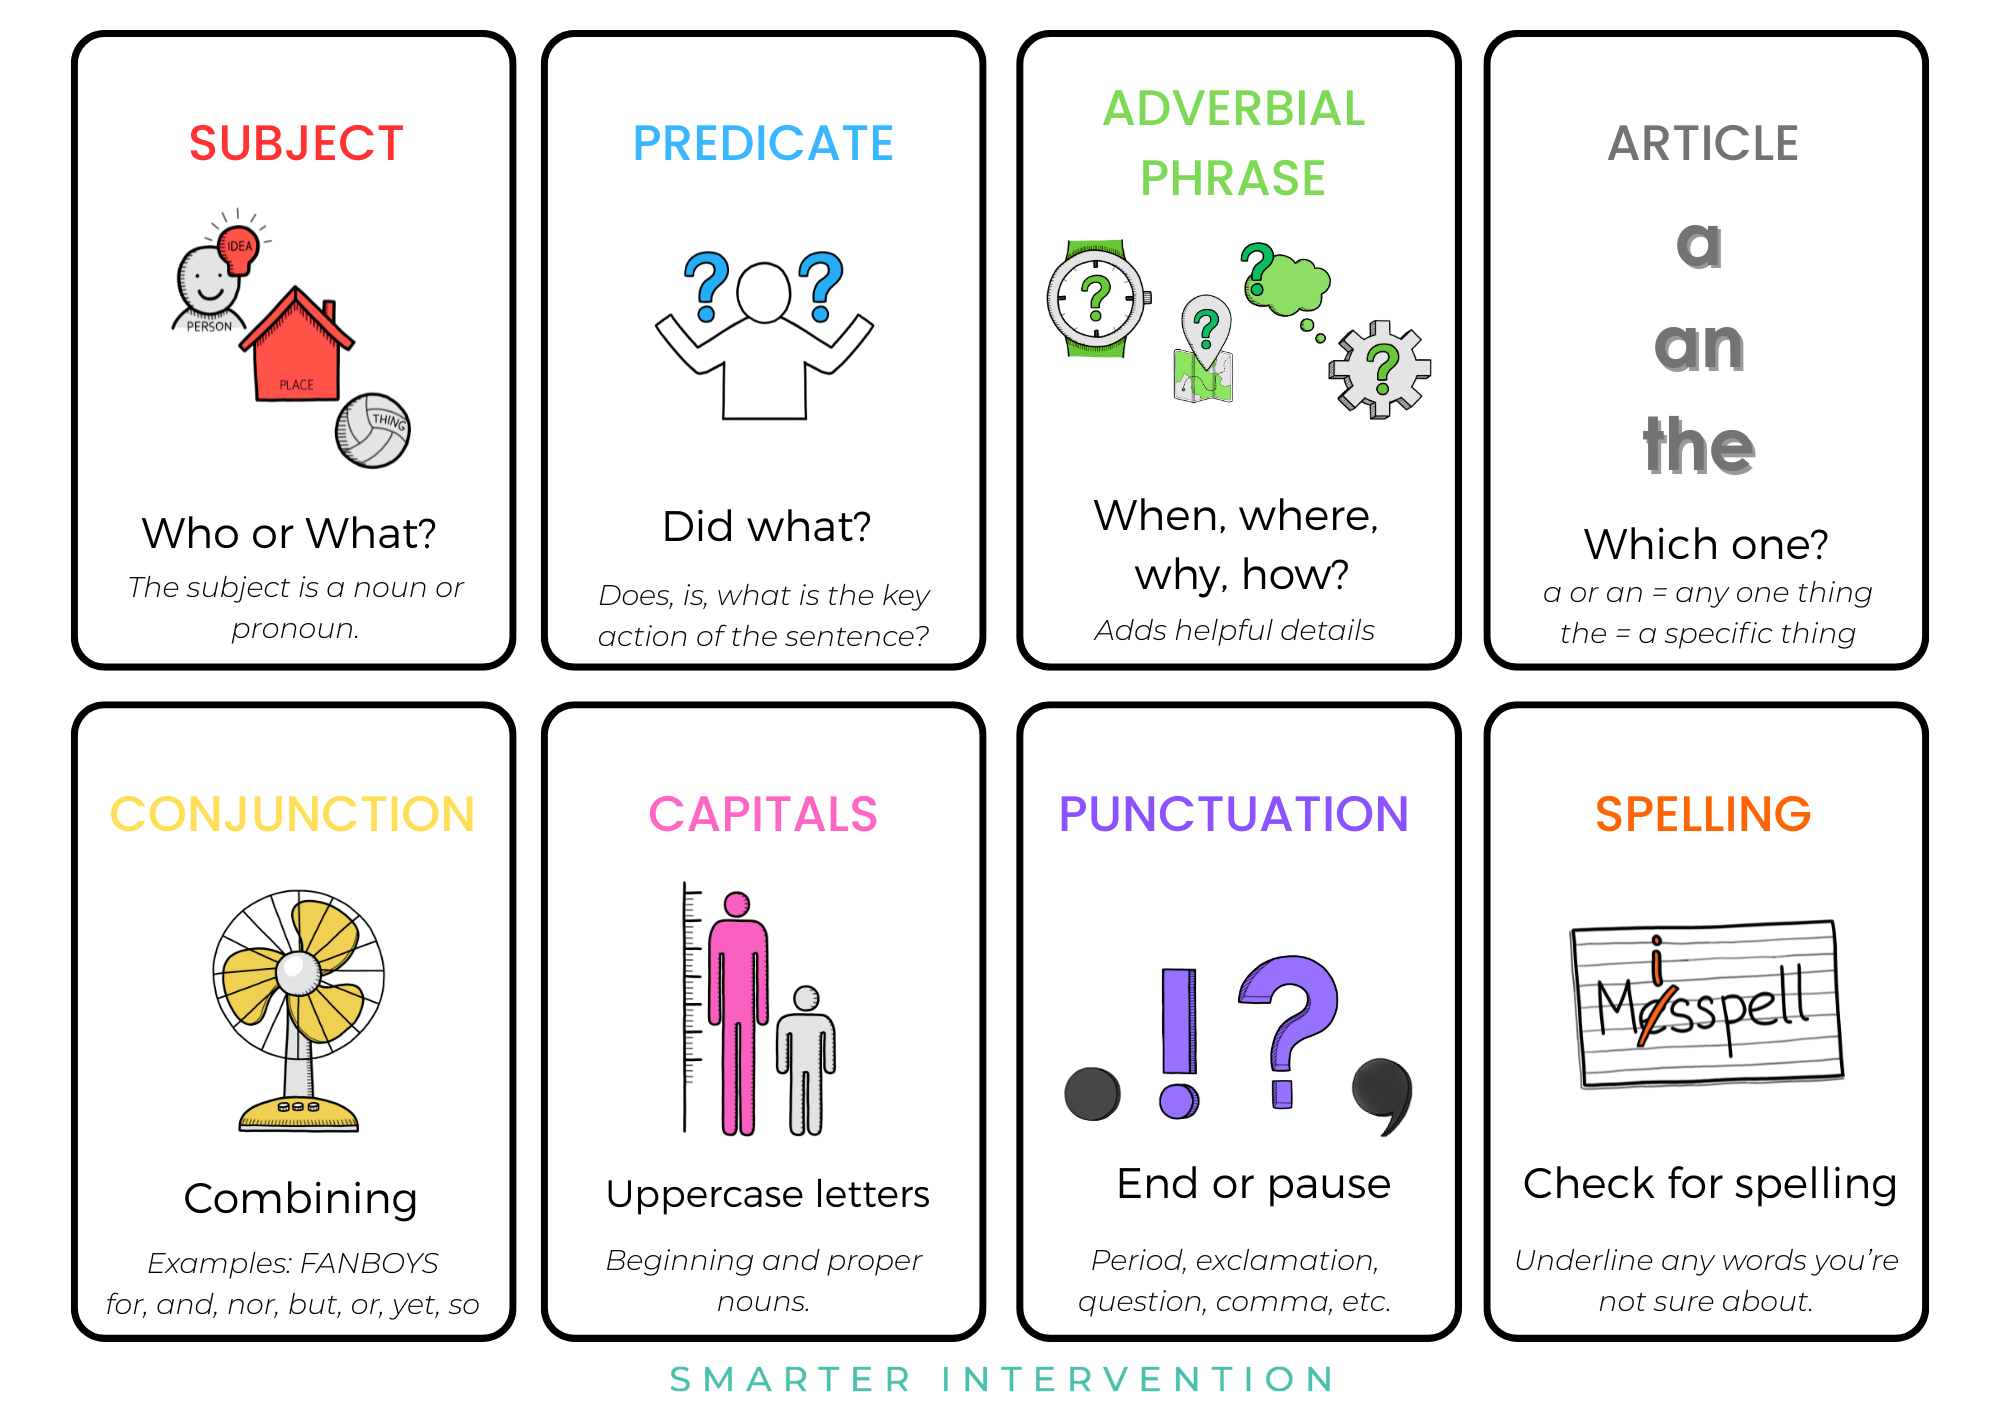
Find the subject (who or what the sentence is about).
Students underline subjects in red.Identify the predicate (what the subject did).
Students underline the predicate in blue.Locate conjunctions (connecting words like and, so, but).
Students highlight conjunctions in yellow.Using FANBOYS (For, And, Nor, But, Or, Yet, So) helps students remember these words and their purpose.
Each sentence should have one subject and one predicate, and if there’s a conjunction, it should connect complete ideas.
Check punctuation and capitalization.
Now students can visually see where sentences begin and end, helping them add periods and capital letters in the right places.Mark unknown spellings in orange.
Even if students can’t fix every word independently, this step shows they’re aware of errors and keeps them accountable.
This step-by-step system transforms editing from a vague “look it over” into a structured process that students can follow consistently.

Why This Works
Using colors, symbols, and visual tools makes editing feel more “concrete” for students who might otherwise feel overwhelmed. It’s breaking up the editing task into more manageable steps. It also builds transferable skills:
Sentence structure awareness (every sentence needs a subject + predicate).
Conjunction control (no run-on sentences with endless “ands”).
Ownership of spelling (students identify what they don’t know instead of glossing over it).
And perhaps most importantly, students see editing as an active, hands-on process, not this “quick glance” before turning in their work.
Try It with Your Students
Next time you ask your students to edit their writing, walk them through these steps. You’ll likely find that their “final drafts” look much stronger, and that they begin to develop an editor’s eye for detail.
And if you’d like to give your students extra practice with sentence structure and editing, you can grab our Sentence Structure visual card resource. This helps students visually see the necessary parts of a sentence and gives a color-coded structure they can use while editing.
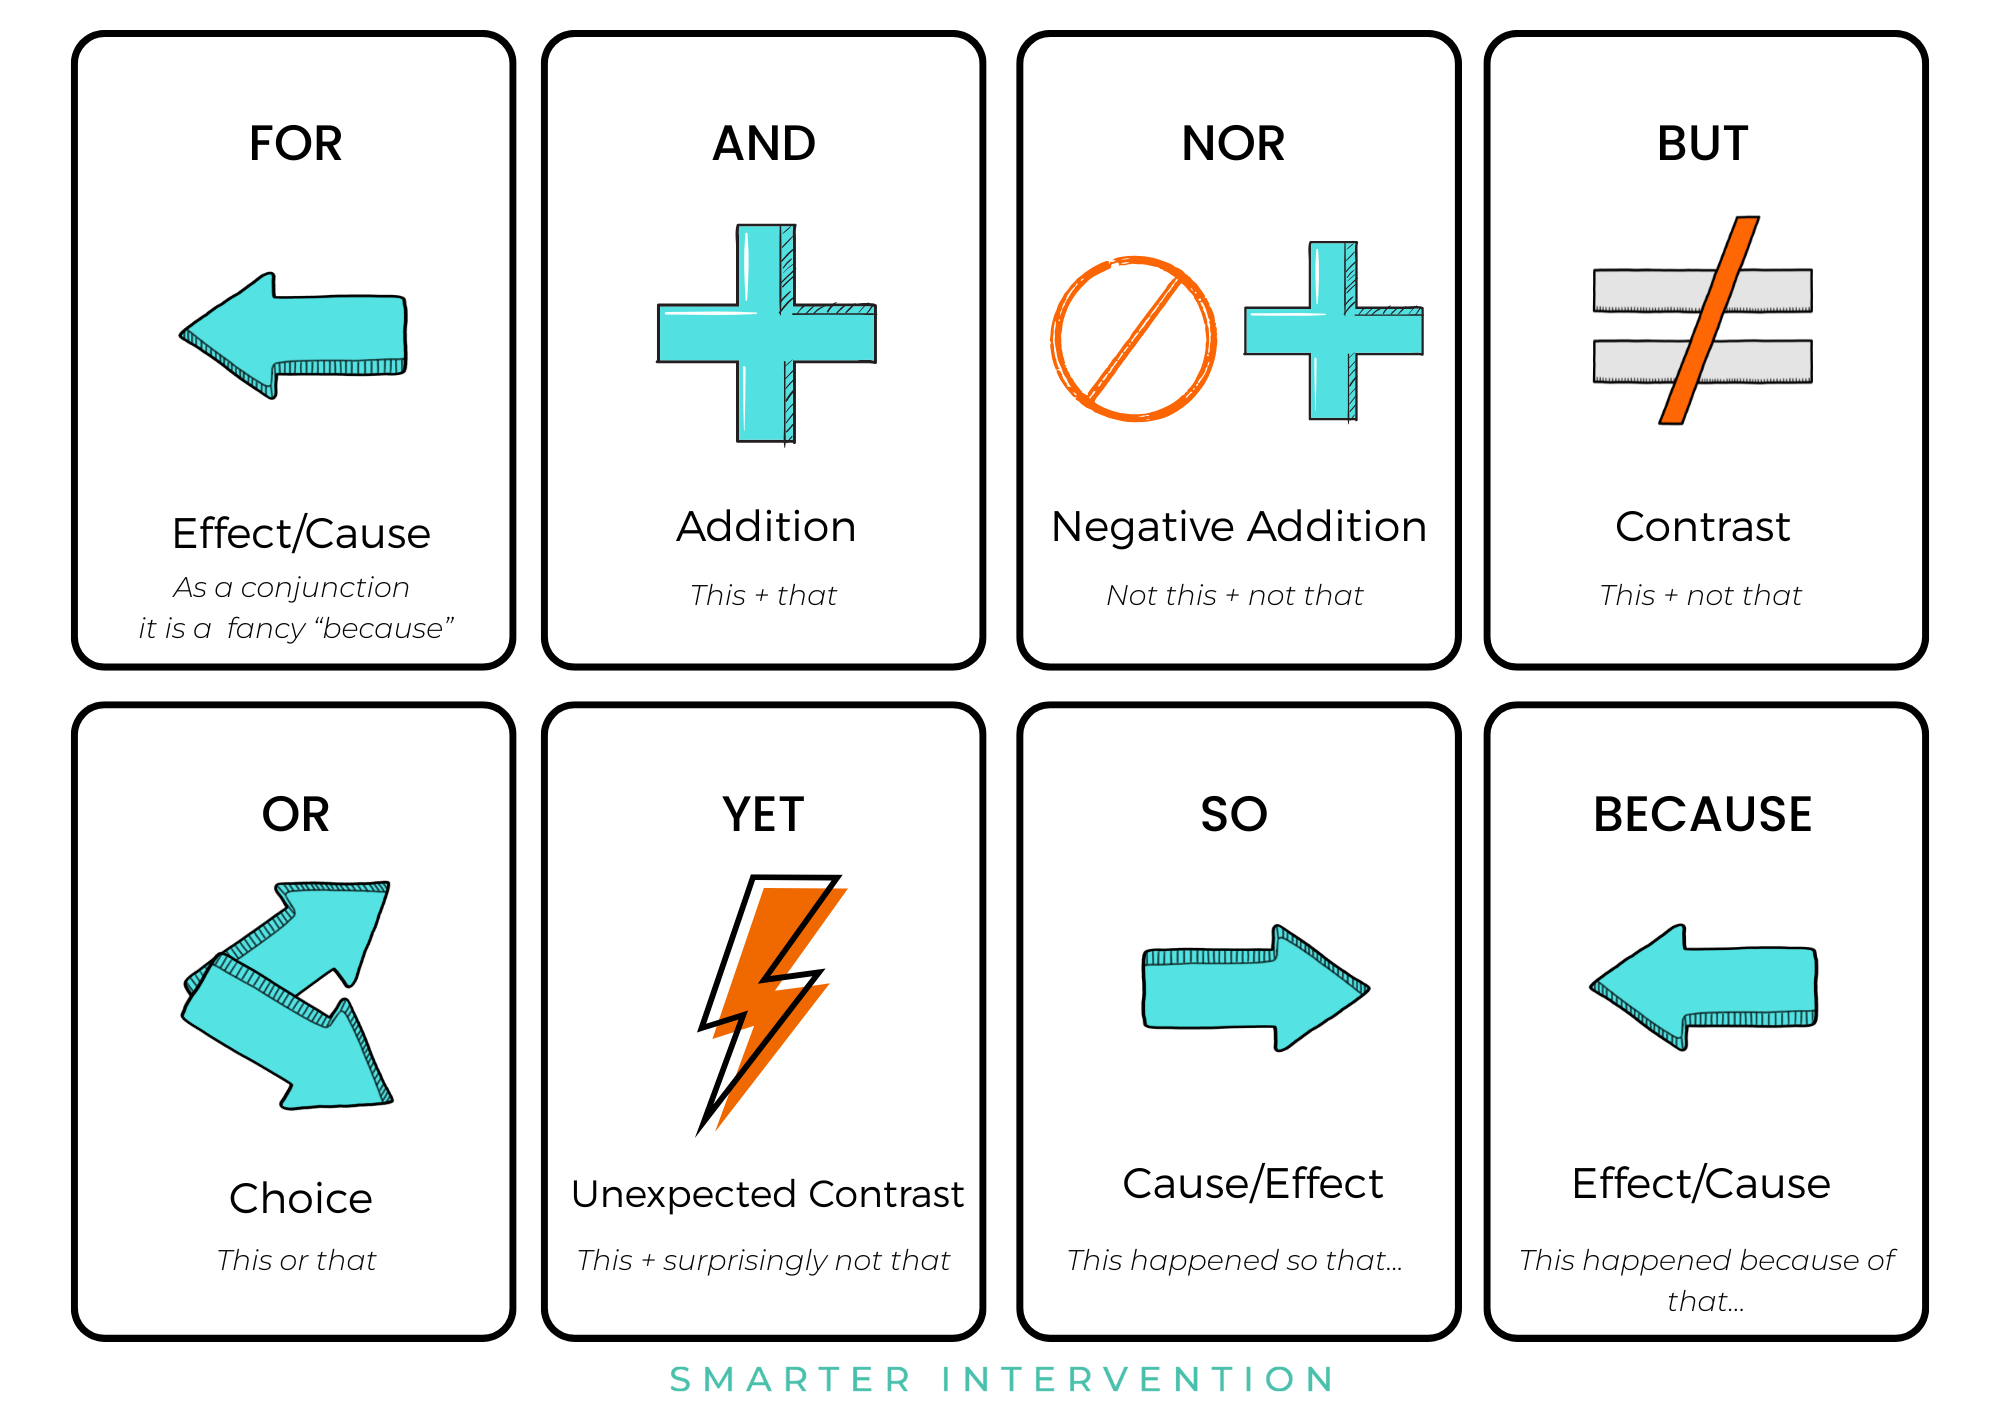
If your students need extra practice with conjunctions, download our FANBOYS visual card resource. It’s a simple, visual way to remind students how conjunctions work and how to use them correctly when editing.
You can have students place this page in a writing folder, or you can laminate and cut each card individually (we love putting them on a ring and adding them to our writing stations), along with a box of markers.
Students can use the different colors of the markers to edit using the visual colors corresponding to the Sentence Structure visual card resource. It makes it much more visual and engaging for students; they actually have fun editing!
Let us know how it goes!